by Richard Tyler Jordan
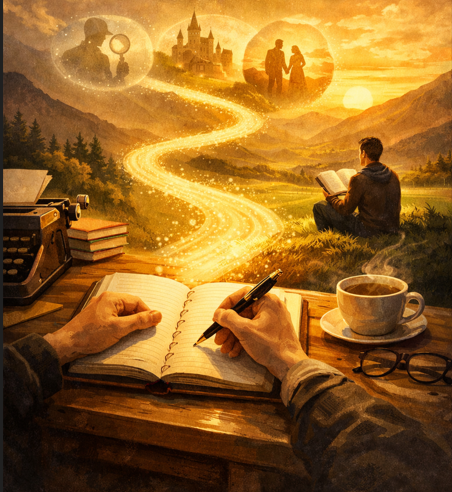
The people in your life are not your material. Your observations are. A writer’s job is not to photocopy reality but to transform it into a story that feels true.
Readers think writers spend their days secretly copying the people around them into stories. Countless times, I’ve heard, “Am I in your book?” My stock reply: “You’re not interesting enough.”
I’ve worked in Hollywood, publishing, and entertainment. I’ve attended enough charity galas, opening nights, family gatherings, and dinners to fill dozens of novels. Yet only one person I’ve known has appeared directly in my books. (You know who you are—@$^&*!)
Your 5 “Do’s”
Here are five things every writer should take from real life—and a couple they shouldn’t (but maybe—why not).
1. Steal Behavior, Not Biographies
The most believable fictional characters are rarely based on a single person. They’re composites. A character might have your stepson’s narcissistic arrogance, your former boss’s talent for taking credit, or your neighbor’s remarkable ability to transform a fifteen-second anecdote into something requiring a nap.
Readers recognize behavior. When you’re observing people, don’t ask, “How can I put this person into my book?” Ask, “What does this person do that readers will identify with?”
2. Capture the Language of a World
Every profession, social circle, and industry has its own language. Lawyers speak differently than truck drivers. Teachers speak differently than politicians. Entertainment executives have perfected the art of saying “no” while sounding enthusiastic. (“That’s an interesting concept” generally means “Over my dead body!”)
Pay attention to how people talk when they’re nervous, ambitious, or trying to impress someone. Those details make a fictional world feel authentic.
3. Watch What People Want
Beginning writers often focus on appearance. Experienced writers focus on desire.
When you enter a room, ask yourself: Who here wants attention? Who wants approval? Who wants a shag? Human beings become remarkably transparent once you start looking for what they want.
Desire drives the story. A character’s goals will always be more interesting than their eye color.
4. Make Reality Cleaner Than Reality
We all know that real life is messy. Fiction should be distilled. An argument that rambles for forty-five minutes in real life may become a one-paragraph scene in a novel.
Real people repeat themselves, wander off on tangents, forget what they were talking about, and stop to answer text messages. If we reproduced life exactly as it happens, readers would fling our books across the room in frustration.
The writer’s job is to select the moments that reveal character and move the story forward. Reality provides the raw material. Craft shapes it into something fun.
5. Turn Up the Volume
Most people have one quality that defines them in others’ minds. The chronic complainer. The attention-seeker. The know-it-all. Spotlight those traits.
The difficult neighbor becomes more onerous. The narcissistic stepson becomes more insufferable. Before long, you’ve got a character readers will remember—and possibly a suspect in a murder mystery.
You’re not changing who the person is. You’re simply saving readers the years it took you to figure them out.
Now for those Two Don’ts…
Mistake #1: Don’t Become a Court Reporter
One of the biggest traps fiction writers fall into is feeling obligated to preserve exactly what occurred. “But that’s not how it happened,” they’ll say. Fine. But if changing what happened makes the story stronger, change it.
Merge characters. Move events. Invent conversations. Fiction owes its loyalty to narrative, not history.
Mistake #2: Never Write Revenge Fiction
Bullshit. Don’t waste a perfectly good villain!
Every writer has encountered an odious boss. A pompous colleague. A manipulative relative. They practically beg to be enshrined in fiction.
The trick isn’t running from revenge fiction. The trick is disguising it. If you simply copy someone you detest and spend three hundred pages punishing them, readers will see through it. But if you borrow the traits that pissed you off and build an entirely new character around them, you’ve got something useful.
(Read Suite Charity and guess which character was inspired by a vile ex-boss of mine. I'll deny everything, of course.)
Final Thought
In the end, a writer’s job is to pay attention.
A mentor once said to me, “Observe relentlessly. Transform creatively.” And if an abominable relative (there’s my rubbish stepson again—and my equally deplorable stepdaughter too!) occasionally turns up as a murder victim in Chapter Three, well, that’s one of the fringe benefits of being a novelist.
Just remember to change enough details to maintain plausible deniability.
Do you use real situations or people as inspiration for your books? How do you handle it? And has anyone ever guessed that they inspired one of your characters?
About Richard

Richard Tyler Jordan began his career as a wide-eyed young talent in Hollywood, where Walt Disney Studios was apparently charmed by his “rare blend of gullibility and tireless work ethic.” He went on to contribute to more than 500 feature film publicity campaigns before escaping to England to write full-time.
Richard is the author of more than a dozen novels, including A Corpse in the Castle, Shadows at Midnight, Murder and a Missing Manuscript, and Gay Blades. He lives with his Irish husband in a 500-year-old cottage, complete with a resident ghost who is more “meh” than “boo.”
He is currently writing the next Timothy Trousdale Mystery, drawing on a lifetime spent observing high art, high egos, and the decidedly unglamorous worlds behind publishing, film, and theatre.
To learn more, contact Robin Blakely at 660-973-2723 or Robin@CreativeCenterofAmerica.com.